🔊 해당 포스팅에서 사용된 컨텐츠는 위키독스의 PyTorch로 시작하는 딥러닝 입문 내용을 기반으로 했음을 알립니다. 설명에서 사용된 자료는 최대한 제가 직접 재구성한 자료임을 알립니다.
포스팅은 CNN(Convolutional Neural Network) 기법을 이용하여 MNIST 데이터를 분류하였다.
같은 MNIST 데이터로 softmax regression과 MLP(multi-layer perceptron) 방식으로도 MNIST 데이터를 분류하였으니 참고하면 좋다.
2021.10.24 - [AI | 딥러닝/Project] - [Pytorch] Softmax regression으로 MNIST 데이터 분류하기
2021.10.24 - [AI | 딥러닝/Project] - [Pytorch 프로젝트] MLP(Multi-Layer Perceptron)으로 MNIST 데이터 분류하기
- 사용 Framework: Pytorch
- 사용 기법: CNN(Convolutional Neural Network) - CNN layer 2개, Max-pooling 2개
- 사용 함수: nn.Conv2d(), nn.MaxPool2d()
- 사용 데이터: MNIST (손글씨 숫자)
모델링을 할 때 크게 4가지 틀을 기억하고 지켜주면 된다.
1. Dataset 설정
2. 모델 설계
3. Cost 함수와 Optimizer 설정
4. Training 과 Back-propagation 수행
모델링 (Modeling)
import torch
import torchvision.datasets as dsets
import torchvision.transforms as transforms
import torch.nn.init

device = 'cuda' if torch.cuda.is_available() else 'cpu'

# 랜덤 시드 고정
torch.manual_seed(777)

# GPU 사용 가능일 경우 랜덤 시드 고정
if device == 'cuda':
    torch.cuda.manual_seed_all(777)

print(device)

learning_rate = 0.001
training_epochs = 15
batch_size = 100


----------------------------------## Dataset 설정 ##----------------------------------
#MNIST dataset
#60,000개의 train data, 10,000개의 test data
mnist_train = dsets.MNIST(root='MNIST_data/', # 다운로드 경로 지정
                          train=True, # True를 지정하면 훈련 데이터로 다운로드
                          transform=transforms.ToTensor(), # 텐서로 변환
                          download=True)

mnist_test = dsets.MNIST(root='MNIST_data/', # 다운로드 경로 지정
                         train=False, # False를 지정하면 테스트 데이터로 다운로드
                         transform=transforms.ToTensor(), # 텐서로 변환
                         download=True)

data_loader = torch.utils.data.DataLoader(dataset=mnist_train,
                                          batch_size=batch_size,
                                          shuffle=True,
                                          drop_last=True)

data_loader = torch.utils.data.DataLoader(dataset=mnist_train,
                                          batch_size=batch_size,
                                          shuffle=True,
                                          drop_last=True)


------------------------------------## 모델 설계 ##------------------------------------
class CNN(torch.nn.Module):

    def __init__(self):
        super(CNN, self).__init__()
        # 첫번째층
        # ImgIn shape=(?, 28, 28, 1)
        #    Conv     -> (?, 28, 28, 32)
        #    Pool     -> (?, 14, 14, 32)
        self.layer1 = torch.nn.Sequential(
            torch.nn.Conv2d(1, 32, kernel_size=3, stride=1, padding=1),
            torch.nn.ReLU(),
            torch.nn.MaxPool2d(kernel_size=2, stride=2))

        # 두번째층
        # ImgIn shape=(?, 14, 14, 32)
        #    Conv      ->(?, 14, 14, 64)
        #    Pool      ->(?, 7, 7, 64)
        self.layer2 = torch.nn.Sequential(
            torch.nn.Conv2d(32, 64, kernel_size=3, stride=1, padding=1),
            torch.nn.ReLU(),
            torch.nn.MaxPool2d(kernel_size=2, stride=2))

        # 전결합층 7x7x64 inputs -> 10 outputs
        self.fc = torch.nn.Linear(7 * 7 * 64, 10, bias=True)

        # 전결합층 한정으로 가중치 초기화
        torch.nn.init.xavier_uniform_(self.fc.weight)

    def forward(self, x):
        out = self.layer1(x)
        out = self.layer2(out)
        out = out.view(out.size(0), -1)   # 전결합층을 위해서 Flatten
        out = self.fc(out)
        return out


model = CNN().to(device)   #.to(device)는 GPU에서 연산 수행


-----------------------------## Cost함수 & Optimizer ##--------------------------------
#비용 함수와 optimizer 정의
criterion = torch.nn.CrossEntropyLoss().to(device)    # 비용 함수에 소프트맥스 함수 포함되어져 있음.
optimizer = torch.optim.Adam(model.parameters(), lr=learning_rate)


-------------------------## Training & Back-propagation ##---------------------------
total_batch = len(data_loader)
print('총 배치의 수 : {}'.format(total_batch))

for epoch in range(training_epochs):
    avg_cost = 0

    for X, Y in data_loader: # 미니 배치 단위로 꺼내온다. X는 미니 배치, Y느 ㄴ레이블.
        # image is already size of (28x28), no reshape
        # label is not one-hot encoded
        X = X.to(device)
        Y = Y.to(device)

        optimizer.zero_grad()
        hypothesis = model(X)
        cost = criterion(hypothesis, Y)
        cost.backward()
        optimizer.step()

        avg_cost += cost / total_batch

    print('[Epoch: {:>4}] cost = {:>.9}'.format(epoch + 1, avg_cost))


print('Learning finished')
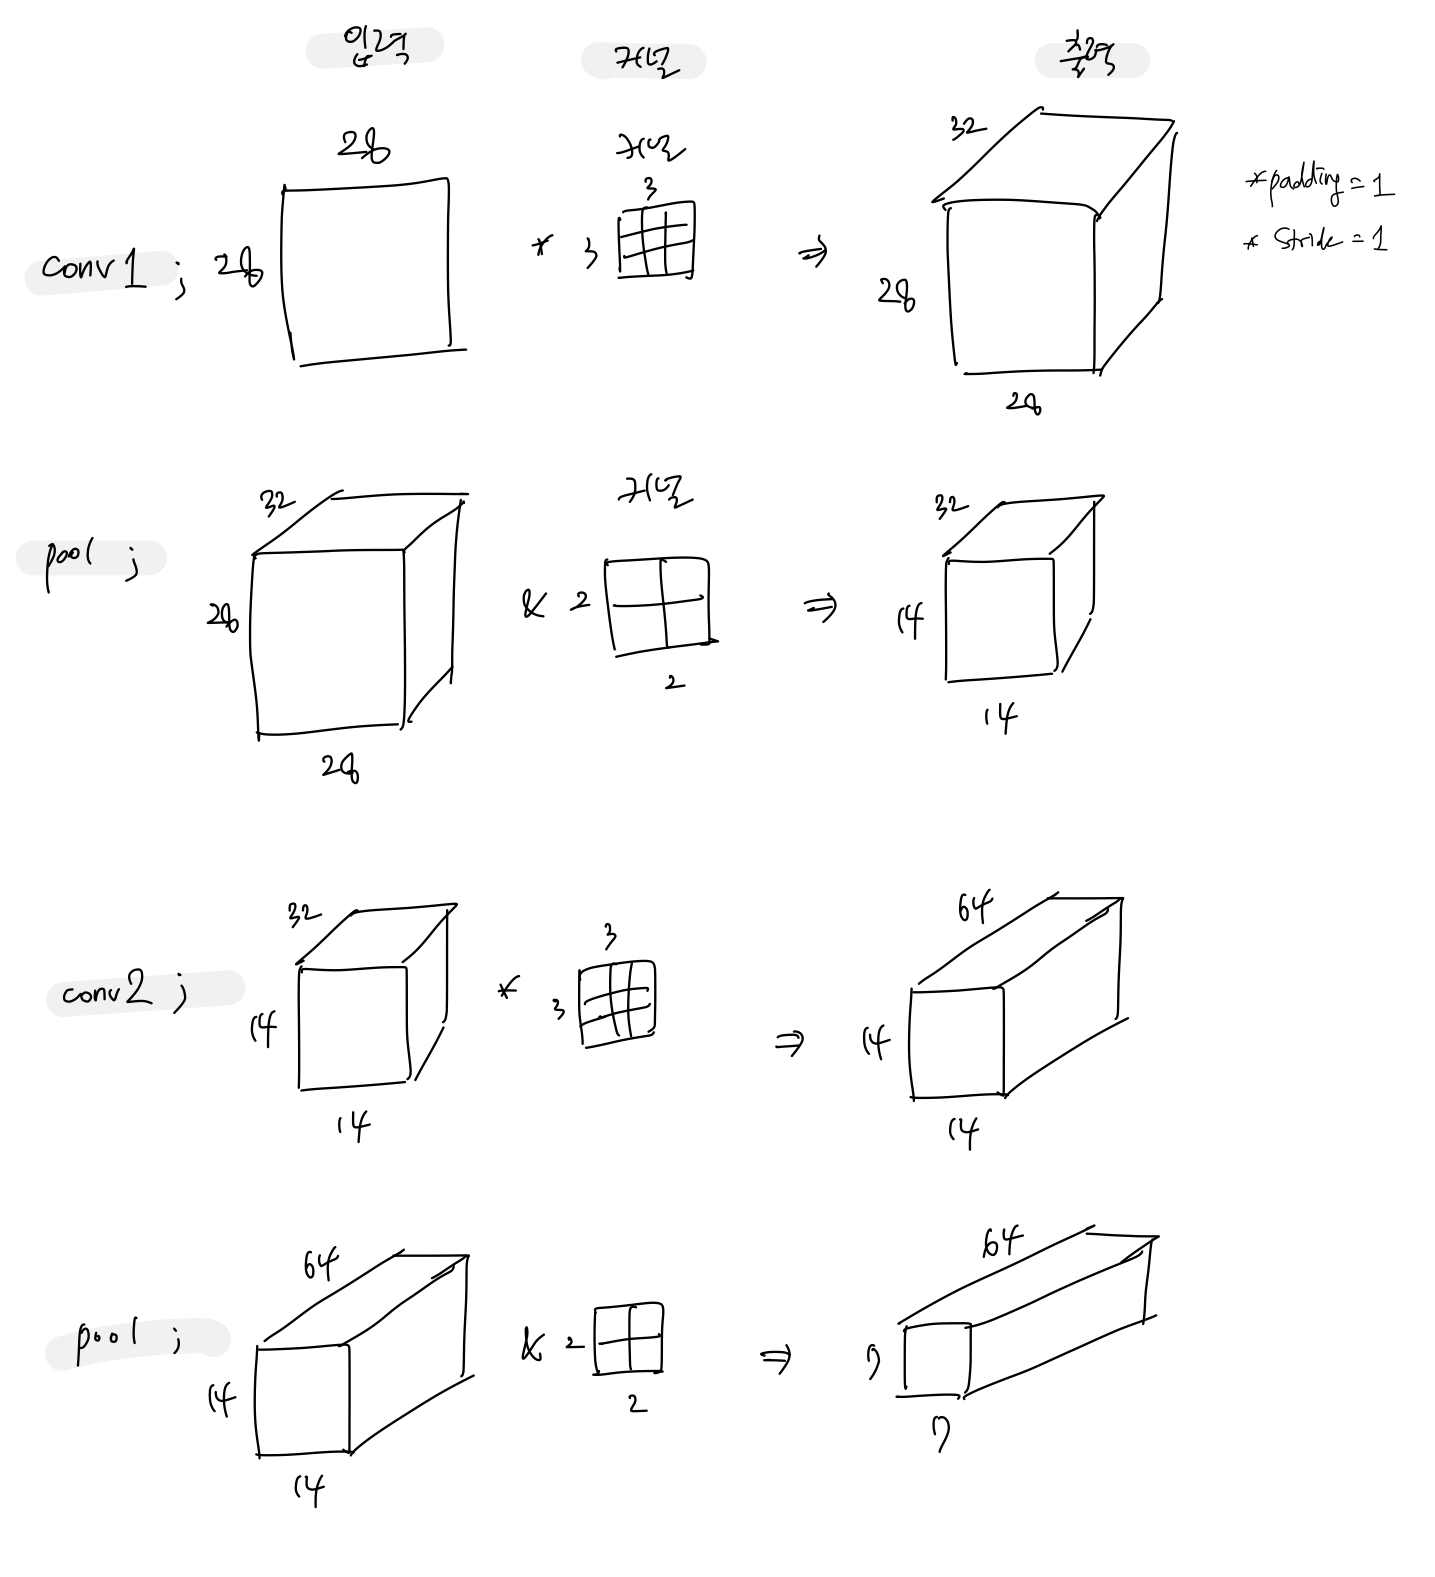
위의 CNN() 함수 속 형태를 그림으로 그려보면 아래와 같다.
순서는 Convolution layer -> Max pooling -> Convolution layer -> Max pooling 이렇게 된다.
Layer를 지날 수록 이미지의 높이와 너비의 크기는 점점 줄어들고 채널의 수는 커지는 형태가 된다.
최종 출력은 높이 7, 너비 7, 채널 64 의 형태를 가진다.
Cost 에러율 결과
아래는 CNN(Convolutional Neural Network) 기법으로 했을 때 training data로 뽑아낸 최종 에러율이다.
epoch 총 15회 진행, 결과는 0.7%이다.
MLP 기법이 3.6%였는데 여기서 더 낮춘 것이다.
cuda
총 배치의 수 : 600
/usr/local/lib/python3.7/dist-packages/torch/nn/functional.py:718: UserWarning: Named tensors and all their associated APIs are an experimental feature and subject to change. Please do not use them for anything important until they are released as stable. (Triggered internally at  /pytorch/c10/core/TensorImpl.h:1156.)
  return torch.max_pool2d(input, kernel_size, stride, padding, dilation, ceil_mode)
[Epoch:    1] cost = 0.225288287
[Epoch:    2] cost = 0.0626441836
[Epoch:    3] cost = 0.0460855588
[Epoch:    4] cost = 0.037274085
[Epoch:    5] cost = 0.0309222061
[Epoch:    6] cost = 0.0258953981
[Epoch:    7] cost = 0.021597296
[Epoch:    8] cost = 0.0178691149
[Epoch:    9] cost = 0.0159220975
[Epoch:   10] cost = 0.013018487
[Epoch:   11] cost = 0.0100171911
[Epoch:   12] cost = 0.00915397983
[Epoch:   13] cost = 0.00875158142
[Epoch:   14] cost = 0.00630737562
[Epoch:   15] cost = 0.00686391536
Learning finished
검증
이번엔 test data를 넣어보며 정확도 확인
import random
import matplotlib.pyplot as plt

# 테스트 데이터를 사용하여 모델을 테스트한다.
with torch.no_grad(): # torch.no_grad()를 하면 gradient 계산을 수행하지 않는다.
    #3차원 Tensor로 사용. Softmax regression과 MLP는 1차원 Tensor 사용.
    X_test = mnist_test.test_data.view(len(mnist_test), 1, 28, 28).float().to(device)   #len(mnist_test)=10,000
    Y_test = mnist_test.test_labels.to(device)

    prediction = model(X_test)  #model() 사용*
    correct_prediction = torch.argmax(prediction, 1) == Y_test
    accuracy = correct_prediction.float().mean()
    print('Accuracy:', accuracy.item())

    # MNIST 테스트 데이터에서 무작위로 하나를 뽑아서 예측을 해본다
    r = random.randint(0, len(mnist_test) - 1)
    X_single_data = mnist_test.test_data[r:r + 1].view(1, 1, 28, 28).float().to(device)
    Y_single_data = mnist_test.test_labels[r:r + 1].to(device)

    print('Label: ', Y_single_data.item())
    single_prediction = model(X_single_data)    #model() 사용*
    print('Prediction: ', torch.argmax(single_prediction, 1).item())

    plt.imshow(mnist_test.test_data[r:r + 1].view(28, 28), cmap='Greys', interpolation='nearest')
    plt.show()
결과
정확도 또한 이전 결과들과 비교했을 때 증가했다.
softmax regression의 정확도: 88.8%
MLP의 정확도: 97.6%
CNN의 정확도: 98.4%
/usr/local/lib/python3.7/dist-packages/torchvision/datasets/mnist.py:67: UserWarning: test_data has been renamed data
  warnings.warn("test_data has been renamed data")
/usr/local/lib/python3.7/dist-packages/torchvision/datasets/mnist.py:57: UserWarning: test_labels has been renamed targets
  warnings.warn("test_labels has been renamed targets")
Accuracy: 0.9837999939918518
Label:  4
Prediction:  4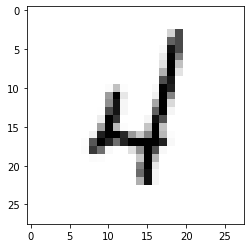
위 글이 도움이 되셨다면, 아래 하트를 눌러주세요↓
감사합니다 \( ˆoˆ )/
'AI | 딥러닝 > Coding' 카테고리의 다른 글
| [Python] 3x3 depthwise convolution 코드 (0) | 2023.09.09 |
|---|---|
| [Python] 1x1 point convolution 코드 (0) | 2023.09.09 |
| [Pytorch 프로젝트] MLP(Multi-Layer Perceptron)으로 MNIST 데이터 분류하기 (2) | 2021.10.24 |
| [Pytorch 프로젝트] Softmax regression으로 MNIST 데이터 분류하기 (0) | 2021.10.24 |
| [딥러닝 프로젝트] 1. 신경망 훈련: 기초적인 분류 문제 (Feat. TensorFlow) (0) | 2021.08.25 |


댓글